New Customer Onboarding / Quickstart
This guide will walk you through the process of getting started with Switchboard, including how to create your first script.
UI App Access
Switchboard App UI access is granted by sending a support ticket at support@switchboard-software.com. They will email the following via a secure link that expires within 7 days:
- URL:
https://app.switchboard-software.com/#/app/your-company/ - Login (your email)
- Password
Writing Your First Script
Switchboard extracts, transforms, and loads data into its destination based on scripts you write in our scripting language, Switchboard Script (SBS) which is SQL-like in its syntax.
Prerequisites:
- Data source of interest (download location) + access credentials
- Data warehouse location (upload destination) + access credentials
Optional:
- Business rules for data source (table transformation)
- Download scheduling (download parameter)
Data Source of Interest
We use our pre-built connectors to authenticate and extract data from data sources.
See Connecting to Data Sources for a non-exhaustive list of available data source connectors.
If you are unsure or do not see a connector for your data source of interest, please contact your CSE for next steps.
If your data source of interest can only provide reporting via email, please contact your CSE for an ingest email alias and ensure the reporting sent is a csv attachment.
Data Warehouse Location
Our uploaders allow us to push your data to your desired destination.
See Uploading to Data Sources for the list of data warehouses we support for upload.
If you are unsure of your data warehouse, contact your company’s relevant data management team for details.
Example Script
The following example shows a trivial example where we will demonstrate how switchboard works using a simple Google sheet.
You will need a Google login for this example to work.
download google_sheet_example_import from {
            type: "google_sheets";
            key: "my_google_outh_key";
            spreadsheet_id: "{your google UIID}";
            data_range: "A:H";
} using {
        "name" : string;
        "phone" : string;
        "email" : string;
        "address" : string;
        "postalZip" : string;
        "region" : string;
        "country" : string;
        "currency" : string;
};

upload google_sheet_example_import to {
       type: "google_sheets";
       key: "my_google_outh_key";
       primary_source_name: "google_sheet_test_import";
       folder_name: "switchboard_uploads";
       spreadsheet_name: "Sample Upload"; // Required
       test_spreadsheet_name: "Sample Upload";
 };
We will be downloading data from a Google Sheet that looks as follows:

Keys: Input the Relevant Credentials
In the “Keys” section of the app (from the left hand nav select “Keys”), click the “+Key” button and find the data source you are looking for under the “Credential Type” drop down that appears under “Add Key”
For this example, both the source and destination is a Google Sheet so we are are going to use the “Google OAuth (Original)” credential type.
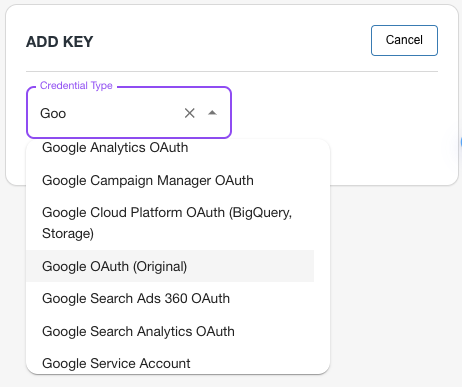
You will add a name and then Sign In with Google so Switchboard can obtain a credential.
For more information, see the documentation on the Google Sheets Connector
Creating Your Script
Since this is a new script, we will go to the Drafts section and click the “+Drafts” button.
In the script editor that appears, you will see a file icon with a “+” symbol at the top of the files column. Click this button to add a new file, which will appear at the bottom of the list with a blinking text entry cursor.
Enter a name (i.e., “Example”) and hit enter.

This will open up the SBS Script editor.

Scripts: Configuring Your Download Block
To start, we will add our download block to our example script. As part of this download block we will define our download with a name that is memorable and relevant.
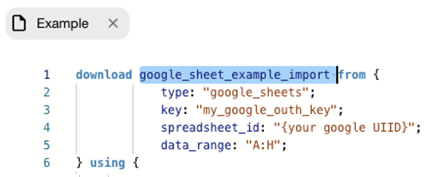
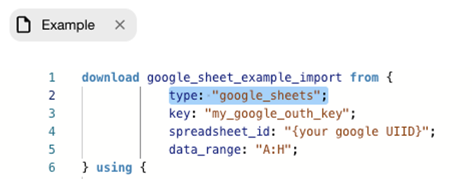
We will give it a type corresponding to the connector we are using — see the connector documentation for the data source to which you are connecting to get the relevant type name.
Note that your download name must be unique across all of your scripts.
In this case the type name is “google_sheets”
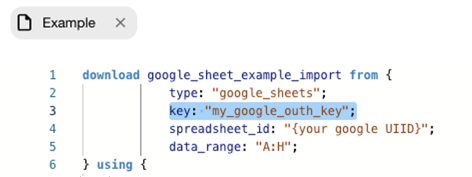
All scripts will also require a “key” that you would have defined earlier (see “Keys: Input the Relevant Credentials”). Here you will use the value you put into the “name” field of the Google OAuth Key you created.
Each data source will have properties that are particular to it, in this case we must provide a spreadsheet_id and a data_range. In this case we need the last string of characters in the URL for your spreadsheet (go to “Share” and “Copy Link” in the Google Sheets doc) and a data_range (A:H)
We will also specify the data fields we wish to copy in the “using” block.
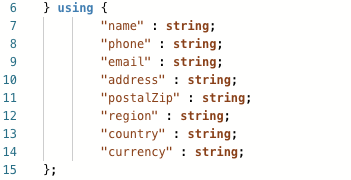
You can now save the script using the “Save” of the “S” hot key.
If there are any errors, such as the key you specified not existing, those will be highlighted and must be fixed.
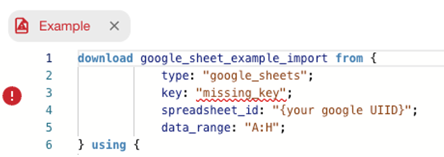
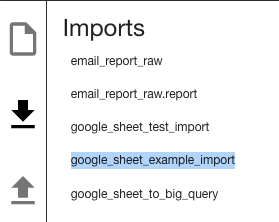
Note that once we have defined our download in the script, it will appear in the “Imports” section (The arrow pointing down in our script editor).
Scripts: Configuring Your Upload Block
For this example we will now define our upload block.
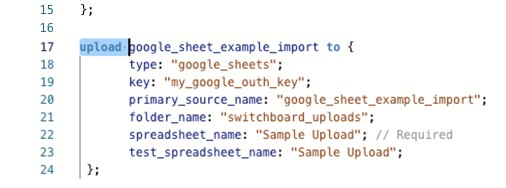
The upload block consists of an upload statement that describes where and how data should be uploaded into a data warehouse so it may be analyzed later.
The upload requires a source for its data, which in this case is the download we declared earlier google_sheet_example_import. In later examples, we will see this this will be intermediary tables we use for transformations.
As with our source, we will need both a type and a key, which will be the same as our download statement.
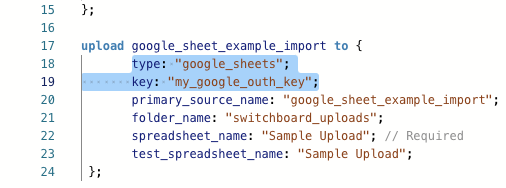
However, as an upload it needs different parameters from the download.
First is the primary_source_name — in this case it will be the same as our download name, as it is the name of the source that was downloaded.
You will also need a name for the folder and the spreadsheet.
See the Google Sheets Uploader for more details.
When you are finished, click the “Save” button.
Note that at this time, the Switchboard app will validate your script to detect any syntax errors, misnamed keys, or duplicate download sources. You will need to fix these errors before the script can be made live by publishing it.
Testing Your Example Script
Before you make your script go live by publishing it, you will want to test it first.
Click the “Test” button. If you have multiple sources you are downloading from, you will be prompted to select which upload (i.e., a upload you have declared) that you wish to test.
You may do this with existing data you have downloaded (”Test with existing downloads”) or you may download it afresh (”Test with new downloads”).
After the run completes, you may check the “Test Runs” section to see if the script ran successfully. This will allow you to trouble shoot issues with credentials or the identifier of the Google sheet you specified.
Publishing Your Script
Once you have verified that your script runs successfully, you will need to click “Publish” button in the upper right hand corner of the script editor in order to make it an active live script.

The published set of Scripts is immutable, so if you want to edit your script again you will need to create a new Draft.
See our Script Management Guide for more details on published and draft scripts as well as how you can use our script history and testing tools.
Adding Transformations (i.e., for Business Rules)
If you have any business rules (sums, case statements, haircuts), they can be implemented in your script via a table statement before your data is uploaded.
Switchboard follows SQL-like conventions.
Further details on taxonomy can be found here: https://docs.switchboard-software.com/switchboard-script/
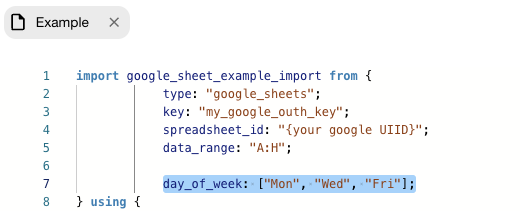
For the full range of scheduling options, see our Scheduling Guide